Showing posts with label cheap kitchesn glasgow. Show all posts

Tuesday 8 December 2015

NICEIC UPDATES 2015


  Regulations in 2015/2016


After I attended a briefing and update session today by the NICEIC I can report on some of the main points of interest to property owners:-
  • Between January and July 2015 electrical installations work undertaken can comply with either the old or the new regulations. From July 2015 the new regulations will apply except in one regard in respect of replacement or new Consumer Units. Any electrical contractor engaged should by January be conversant with the new regulations.
  • Not unexpectedly the changes to regulations are there mainly to improve safety to persons and property. A few of the changes are to better align our regulations alongside common European regulations.
  • For home owners, from January 2016 at the latest, the main change will be a slightly different construction for Consumer Units (aka Fuse Box). Consumer Units will need to be of a fire resistance construction, in other words steel. They may not be quite so pretty and the method for the cables entering the Consumer Unit may not be so flexible or pretty either.  We shall have to wait and see what the manufacturing industry comes up with over time as they accommodate this new requirements.  I would forecast that prices for these new steel Consumer Units will be more expensive to manufacture and will take a little longer to install.  It also means that from mid 2014 there could be a flood of 3rd Amendment Regulation non compliant Consumer Units available at knock down prices.
  • For commercial businesses, schools, colleges and government buildings there will be stricter requirements for additional protection against electric shock on socket outlet circuits by increasing the use of safety devices called RCDs.  It will be a useful change in increasing safety but it does mean perhaps increased costs and in some cases a different approach to design circuits for computer equipment in offices and education establishments.
  • The will be more focus of design, inspection and testing of control circuits such as those used for central heating systems. This could present some challenges for Gas/Oil heating system engineers who may in the future have to call in an electrician whereas previously they could have completed the wiring to control valves, controllers and thermostats themselves.  This too will have cost implications on home owners.
  • The regulations for formal Inspection are changing a little as well. Enough require all new stationary and reference material for electrical contractors. Also new  methods and adjustments to learn how to use for recording results.
  • Interestingly there is a new regulation that when Periodic Inspections and Tests (EICR)are being undertaken in Homes and Business Premises then inspection to some degree or another in accessible loft spaces is now required unless recorded as a reasonable non compliance. Previously the inspection of wiring in loft spaces was a reasonably accepted omission. This is certainly a safety improvement as I personally have found a fair number of safety issues with wiring in lofts.
  • Another change is the need to ensure cables that run above or across safe exit routes but be secured with supports that will resist heat/fire. This is to avoid fire fighters and escapees being tangled up in drooping wire when try to get out of fire damaged building. Apparently the Fire Fighters requested this changes because there had been several deaths because of this problem.  To installing electricians this is a fairly  easy requirement to meet by using metal type buckle clips or purpose designed cable retainers for use inside trunking.
  • In the new Regulations there will now be approximately 1500 individual regulations, and increase of several hundred compared to the current issue.

Wednesday 25 November 2015

Electricians new regulations (Scotland)


WES ELECTRICAL 01418405236


WESThe Institution of Engineering and Technology (IET) has announced the IET Wiring Regulations BS 7671:2008 incorporating Amendment No. 3:2015 will be available in January 2015 in both print and digital formats. The amended IET Wiring Regulations, which sets out the national standard for which all new and amended electrical installations are to comply, will feature a number of important new changes and will be available from the IET from 5 January 2015. This latest amendment, the third following Amendment No.1 which was published back in 2011 and Amendment No.2 in 2013, will be published as a new consolidated book.

The amended regulations will include changes to the electrical condition report section, new requirements for mobile and transportable electrical units and changes for the installation of luminaries and light fittings – bringing them in line with the latest international and European standards. The amended IET Wiring Regulations will also include the new Regulation 421.1.200. This regulation requires that within domestic (household) premises, consumer units and similar switchgear assemblies shall comply with BS EN 61439-3 and shall have their enclosure manufactured from non-combustible material, or enclosed in a cabinet or enclosure constructed of non-combustible material and complying with Regulation 132.12.

This has been developed to safeguard against the risk of fire that can be produced from the overheating of connections in consumer units. Geoff Cronshaw, chief electrical engineer at the IET said: “The amended IET Wiring Regulations BS 7671:2008 incorporating Amendment No. 3:2015 will set the electrical standards for those professionals working in the electrical, construction and built environment industries. It is paramount that, as an organisation, the IET continues to ensure that electrical standards are up-to-date and relevant to the ever evolving requirements of the UK’s electrical industry. “What’s more, it is essential that all electrical industry professionals familiarise themselves with the amended IET Wiring Regulations when they are published in January 2015, to ensure that the work they do is compliant and, most importantly, is carried out in a safe and appropriate manner.”

 The IET will be making the amended Wiring Regulations available from 5 January 2015, both in print and via a digital subscription; more information and pre-orders are available now at www.theiet.org/amend3-books-pr.

westend Glasgow electricians

Tuesday 21 October 2014

EMERGENCY LIGHTING TESTING GLASGOW

wes electrical 01418405236

Testing Emergency Lighting

Maintaining your emergency lighting units is important to ensure that lighting tubes are actually working and that the backup battery is capable to last the full duration required by the standards. The "responsible person" of a business or organisations ensures that the periodic checks are carried out and documented in a fire safety logbook. Below we have provided an overview of the testing procedure to give an overview of the testing frequencies.
Please note that when you purchase emergency lighting from Safelincs you will be offered to register for a free emergency lighting test reminder at the end of the checkout process. We will then email you to remind you when the tests are due. 
To make the testing of your emergency lighting units quicker you can install self-test emergency lighting. These units automatically replicate a power cut, checking their own circuitry and functionality and should a fault be found the units create both a visual and audible warning .
Standards BS 5266-8:2004 and BS EN 50172:2004 describe the testing of emergency lighting units.  

Monthly

Switch off the mains power supply to the lighting unit. Often, a separate switch with a 'fish key' is installed allowing the testing of emergency lights without having to switch off all power. Walk past all emergency lights to ensure they are working. Note any defects and get repaired immediately. Record your results in your fire safety logbook. 

Yearly

Switch off the mains power supply to the lighting unit. Leave the units illuminated for the rated period (usually three hours). The lights should be on for the whole period. If lights fail within this time, replace the backup battery.

electricians westend glasgow

Sunday 21 September 2014

TESLA WIRELESS POWER

£30K ELECTRIC CAR EXPECTED TO APPEAL TO THE MASSES

04SEP 2014
Tesla Motors, the company responsible for producing the all-electric Model S, a car that Consumer Reports rated the “Best Car Ever Tested” in 2013, is expected to today announce plans to build a new $5 billion dollar plant in Nevada which will produce electric car batteries for their upcoming 2017 model.
Being dubbed the “Gen III,” the new Tesla all-electric car is expected to have a range of 200 miles per charge and retail for approximately $35,000 dollars – A price point which is expected to appeal to the masses. The Tesla “Gigafactory” is projected to produce 500,000 battery packs for electric cars each year by 2020. Sources familiar with the project have indicated that the Nevada location was selected due to its proximity to America’s only active lithium mine.
Designed to reduce battery costs by 30 percent, the Gigafactory is Tesla’s company advantage in producing a more affordable, mass-market electric car. For industry watchers, however, the move also translates to a lot more demand for lithium.
In a note sent to shareholders in late March, Lithium Exploration Group CEO Alex Walsh said Tesla is expected to consume up to 15,000 additional tons of lithium carbonate once its Gigafactory operations are in full swing in 2017. To put the amount in perspective, total global demand for lithium carbonate in 2012 was around 160,000 tons, according to international metals and minerals research and consulting firm Roskill.

A MATTER OF TIME

“It’s just a matter of time before electric vehicles take over the market,” said Dennis Bryan, senior vice president of Western Lithium. “Given the continued growth factor in lithium, we expect demand to increase substantially.”
Sales and adoption of electric vehicles (EVs) like the Tesla Model S, Tesla Roadster, and Nissan Leaf have been steadily increasing over the past few years thanks to the financial savings associated with “fueling” a car with electricity. The cost to “fill up” is under $5 dollars, as opposed to $40 dollars or more to refill an automobile with gasoline. Financial savings can be even greater when you install a home solar energy system to collect sunlight and recharge an EV with solar power.
Previous reports have shown Tesla’s new Gigafactory will be powered by on-site renewables including solar and wind power: solar panels
tesla-motors-solar-powered-gigafactory

SOLAR POWERED TESLA GIGAFACTORY AT A GLANCE:

  • Expected to drive down the per kWh cost of EV battery packs by more than 30 percent
  • Forecasted to produce approximately 500,000 EVs per year by 2020
  • Will take up approximately 500-1,000 acres
  • Will employ approximately 6,500 workers
  • Model 3/Model III will be 20% smaller than Model S,
  • Expected to have electric range of 200 miles at approximate cost of $35k
  • Design expected to be unveiled in 2016, car available for purchase in 2017

TESLA SOLAR POWERED SUPERCHARGING

Tesla Motors is simultaneously building a national network of solar powered electric vehicle fast charging stations.
tesla-ev-supercharging-stations-solar-powered-cars
Tesla’s EV ‘Supercharger’ technology provides a half charge (approximately 150 miles of driving range) in as little as 20 minutes, all compliments of a beautiful solar panel canopy which adorns the top of the EV charging station.

Sunday 22 December 2013

WES Electrical Westend Glasgow


Westend Glasgow Electricians employ three full-time electricians.

Between them they have over 50 years experience in all aspects of electrical works including Domestic Housing, Commercial and Industrial.


Each of our electricians are:


Fully qualified to 17th edition Regulations

Fully qualified to City and Guilds 2391 Inspection, Testing and Certification


 At Westend Glasgow Electricians we have a well deserved reputation for being dependable, professional, reliable, and for carrying out all works to a high standard of quality at a very reasonable price.

DOMESTIC HOUSING

In order to give a top quality service we make sure to carry a stock of the most commonly requested items on our vans. This ensures that if the work we are asked to carry out is one of the most common things, for example changing a light fitting, or a light switch or socket, or adding additional sockets, we do not have to spend time going away to an electrical supplier to collect these items. This keeps the cost of the work down and enables us to provide an excellent service at a very reasonable price.For smaller works we are usually able to attend your home at a time of your choosing and advise on the best way of carrying out the work in the most cost effective manner. We will be able to give you a price there and then, and if you are happy with the price we can carry out the work straight away. This saves having to make a second visit and helps to keep the cost to a minimum.

Our electricians always make sure to keep disruption to a minimum while carrying out the works, and on completion carry out a thorough clean-up.


Westend Glasgow Electricians carry out all aspects of electrical works to Domestic Housing ranging from a Full Rewire to changing Plug Sockets and Lights.


At Wes electrical all quotes are given free of charge and at no obligation.

Monday 9 December 2013

DIY DANGERS

There are so many programmes and articles on how to D.I.Y and sometimes, it is easier to watch a YouTube video and have a go yourself. Some jobs however are better left to the professionals. Especially with electrics where you can be seriously harmed if something goes wrong.
One of the biggest dangers of doing DIY electrical work is the electricity itself. We are so used to pressing buttons or flipping a switch we forget how powerful it can be. The slightest mistake like using the wrong tools, brushing a wire against another or forgetting to turn of the power, can lead to anything from electric burns to death. While you may be fine Googling how to change a fuse, it is always better to contact reliable and cost effective professionals like Westend Glasgow Electricians, to ensure no avoidable accidents occur.
Professionals at Westend Glasgow Electricians know exactly how to test circuits and find out where problems are coming from. This can be more difficult in older houses with dodgy wiring and the labelling on the fuse box has faded. Not only are you creating hazards when you carry out electric work yourself, you may not be meeting regulations. This could lead to a lot more problems like invalidating any home insurance if the problem was caused by work not following standards. By using a qualified and registered electrician, you can rest assured they are covered by their insurance and will carry out the job professionally and can be held accountable.
If you’re in doubt, it is always better to use a professional so call west end glasgow Electricians today to get free advice.

Sunday 3 November 2013

Kitchen fitter in Westend Glasgow


WESTFIELD KITCHENS BRINGS TO YOU AN OVERVIEW OF FITTING A KITCHEN IN WESTEND GLASGOW.


WE ARE PROFESSIONAL KITCHEN FITTERS FEEL FREE TO VISIT OUR WEBSITE FOR MORE INFO www.westfieldkitchens.co.uk

If you are planning to fit your own kitchen then just follow our step-by-step guides and instructions to help you on your way. We have included photos to assist the DIYer and to give you a better understanding on how your stunning new kitchen can be built.
Not only will you save hundreds of pounds by fitting a kitchen yourself, but you will also have a great sense of pride once it has been fitted.
Fitting a New Kitchen

FITTING A NEW KITCHEN – 1 What you need

To completely fit a new kitchen you need to be a competent DIYer, with good skills in carpentry and a good knowledge of electrical and plumbing work. If some of the work needs to be carried out by a plumber, (Gas Safe registered for gas work) joiner or an electrician then these are costs that need to be considered. Even with these costs you can save a lot of money fitting the kitchen units yourself. I was recently quoted around £1500 to fit a basic kitchen and the quote excluded plumbing and electrical work so there are great savings to be made with DIY.


Fitting a new kitchen isn’t a ‘two minute job’ and requires a lot of tools :-
Battery drill / driver plus wood and masonry drill bits, electricians screwdrivers, power / pipe detector, claw / lump hammers, bolster chisel, spirit level, pliers, side cutters, pump pliers, saw, Jigsaw, tape measure, sealant gun, square, marker pens.
Don’t forget safety equipment such as goggles, face mask and gloves. If you are using 240volt power tools use an RCD protection device.
Always remember Safety comes First, check before starting work where the services are in the kitchen, use a power / pipe detector to check for hidden live cables and water / gas pipes before removing the old kitchen units, drilling holes or chasing out walls.

FITTING A NEW KITCHEN WESTEND GLASGOW – 2 Plan the layout

To plan your new kitchen layout start by taking measurements of the kitchen area, when you have finished it is worthwhile double checking your measurements to save a lot of future problems.
These are some points to consider with your layout :-
The sink unit is usually positioned under a window.
Sink units and hobs should not be positioned too near or on a joint in a worktop.
Washing machines and dishwashers should ideally be positioned near the sink as this will reduce the amount of plumbing required.
Hobs require space on either side for pan handles.
Extraction units should be installed either near, or preferably on, an outside wall.
Don’t ‘box in’ any gas appliances as they require good airflow for correct operation and safety.
Are the existing services in suitable positions for your new kitchen layout, i.e. sockets and switches should not be positioned above hobs or cookers.
Will the new kitchen be user friendly and practical.
Wall units and the base units below them, should where possible, be the same width, so doors and handles line up.
Sockets should be around 150mm from the finished worktop to allow room for the plug top flex, they can of course go higher, if you know the size of tiles you are going to use, it is in my opinion easier to tile if the socket(s) are on the tile line.
Before you carry out any electrical work in the home check out the building regulations on the Government or local authority website specifically the Part P regulations  and Electrical safety in the home. Although I am aware of the current rules it is worth reading the latest regulations as they have been updated in the past.
Any gas work will require a Gas Safe registered  plumber / engineer.
When you have made a list of the units required for the kitchen don’t forget all the extras such as cornice, pelmet, plinth, corner post, jointing kit with coloured jointing compound, water waste kit, decorative clad end panels to match the doors, including maybe an extra one to use for filling any gaps, any appliance doors, etc.

FITTING A NEW KITCHEN WESTEND GLASGOW – 3 Preparation

The first step towards fitting your new kitchen is removing the old one. Wear the appropriate safety equipment, gloves, goggles, etc.
Remove all the doors, drawers and shelves first, then remove any screws that are fixing the worktop(s) to the base units. If the worktop edges are under tiles you may have to remove some, if not all of them to ‘free up’ the worktop. Some old kitchens have the worktop glued to the base units so the only removal solution may be a lump hammer and crowbar.
The units themselves should be relatively easy to remove and come apart fairly easily, especially with ones trusty lump hammer, but watch out for hidden cables and pipes, an indoor pool is not always appreciated. Once the water is turned off, the pipes cut and the sink unit removed, it is a good idea to fit in-line / gate valves to the remaining pipes, at least this enables the water to be turned back on, and fitting new pipework should hopefully not have to interrupt the water supply. Try and get some assistance when removing the wall units as they may be heavy or simply awkward to handle by yourself.
If you are disconnecting any electrical supplies, switch off the consumer unit and remove the fuse / miniature circuit breaker as well, this reduces the chance of the circuit becoming ‘live’ if the consumer unit is switched back on by accident, double check the supply is ‘dead’ at the point of disconnection, if in doubt use the services of a qualified electrician as electric shocks can be fatal. Don’t attempt to disconnect any gas supplies, the law says this can only be carried out by a Gas Safe registered  plumber / engineer.
So now the kitchen area is cleared, any repairs to existing walls and floors can be carried out. Holes in walls for air extraction and waste pipes can drilled / knocked through, electrics and plumbing can be installed to suit your new kitchen, don’t forget electrical supplies for wall unit lighting and the extract fan if they aren’t already in position, usually when an oven and separate hob is installed the oven comes fitted with a 13amp plug top and may require the installation of an extra socket outlet, the electric hob is then connected to the cooker switch, as this can have a much higher current demand.

FITTING A NEW KITCHEN WESTEND GLASGOW – 4 Where to start


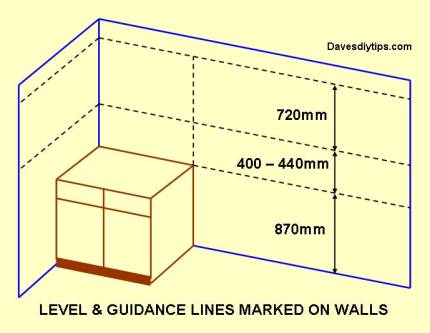
Your new kitchen units have been delivered and the kitchen area is ready for the install, but where do you start ?. The first job to do is check the level of the floor, wherever the highest point is measure up 870mm and mark the wall, this measurement allows 720mm for the base unit and 150mm for the plinth. From your mark draw a level line using your spirit level across the wall(s), this is the guideline for all your base units, now measure up from the 870mm mark to the bottom of your wall units (this measurement is down to personal preference) , I would suggest 400 – 440mm, from this mark draw a level line across the wall(s), and finally measure up from the mark to the top of the wall units i.e. 720mm, and once more draw a level line across the wall(s). Now double check your lines are all level.
Create a space where the units can be assembled, some of the unit flat-packs can be very heavy, so get assistance when lifting them, use the cardboard packaging to cover the floor to stop the units from getting scratched, and keep all the hinges and coloured blanks in a box for later. Assembling the first unit using the instructions can take a while, but once you have an assembly method the rest will go together quite quickly. If you are using a battery drill / driver without torque control take care not to over tighten screws, it is sometimes safer to use a screwdriver for the last one or two turns.
If your kitchen is in a ‘L’ or ‘U’ shape start fitting the units from the corner working out in both directions. Before fixing the wall units I prefer to place the first base unit levelled up and in position, then I mark the wall with a vertical line from its edge so I have guideline for the wall units so they will line up with the base units. Wall units usually come with two fixing brackets each, when you have assembled the wall unit, measure where the fixing brackets need to be in order for it to ‘hook on’, transfer the measurements to your wall and fix the brackets securely, I normally drill the fixing(s) at a slightly downward angle as this reduces the chance of the fixing ‘pulling out’. Use good quality fixings and in the case of plasterboard, use cavity fixings where the brackets don’t land on a wall stud. For peace of mind on a plasterboard wall I always fit additional angle brackets between the wall studs and the top of the wall unit so I know I have a good fixing, they may be a little unsightly but they are usually out of sight and can be painted or papered over, at least you know the wall unit won’t become a base unit overnight !. Mount each wall unit checking them with a spirit level and making sure the edges are flush as you go along, they are adjustable via two screws inside either top corner of the wall unit, one screw raises or lowers the unit, the other pulls the unit tight against the fixing bracket and locks it in position. At this stage don’t worry about any small gaps between the wall unit end and the wall itself.
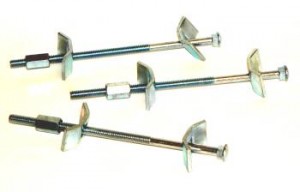
As I explained earlier in this post, start installing the base units from the corner ( if you have one ), make sure each unit is level before moving onto the next one, use your 870mm level line as the guide, The sink base unit will of course require holes drilling to allow the water / waste pipes through to the bottom of the sink unit, Don’t fix the units to the wall until they are all in position and you are sure they are all level. Most flat-pack kitchen units come with two male / female bolts that can be fitted between each unit, these usually require a hole drilling of approximately 5mm dia through the sides of the units, but when fitted hold the units together and keep the edges flush ( drill new holes for the bolts, don’t be tempted to use existing ones as they may be for drawer runners, etc ).

FITTING A NEW KITCHEN WESTEND GLASGOW – 5 Worktops

I am assuming for the purpose of this post that you will be using joint strips between the worktop edges, you can of course cut a mitre joint using a router and jig but this is a task where I would use the services of a skilled joiner, these cuts have to be precise and the cost, not forgetting the wait for a replacement worktop, has in the past put me off having a go. If you are skilled and confident enough to cut a mitre joint, check first that your router has a collet big enough to take an half inch (13mm) router bit, as the ‘bits’ which cut to worktop depth usually as far as I am aware have an half inch (13mm) shank, whereas most DIY routers will only take up to an 8mm shank. Butt joints (worktops joining edge to edge) are easier but have to be cut accurately, on the reverse side of the worktop(s), slots have to be cut-out using a router and jig, clamping brackets which sit in these slots are then tightened from below when the worktop is in position on top of the kitchen units.
Worktop jointing clamps
Coloured joint sealant and solvent


Try not to have the joint too near any of  the ends of the base units as the clamps may be difficult to gain access to and tighten up. Coloured jointing sealant should be put onto one edge of the two sections of worktop and as you tighten the clamps check constantly how flush the worktop edges are simply by touch, take care not to over-tighten the clamps as the finished edge of the worktop might start to ‘lift’ . When you are satisfied with the quality of the joint, clean away surplus joint sealant with the solvent that should be supplied with it. Incidentally the coloured sealant is very handy to mask any small chips or scratches that may unfortunately occur during the fitting of the worktop(s).
  • Fitting kitchen worktops requires assistance, not only for cutting them to length, but also because of their size and weight, the last thing you want to do is to damage one when placing it on top of the new kitchen units. If you have a ‘U’ or ‘L’ shaped kitchen start with the centre or ‘back’ worktop. Before you cut the worktop to length measure along both the back and front edges of your base units just in case the walls are not quite square and transfer these measurements to your worktop. Double check your measurements and remember you can allow a few millimetres for any end that will have wall tiles overlapping the worktop edge, then do the cut, this can be done using a woodsaw, but a jigsaw certainly makes the task easier, just remember to use goggles and a face mask, if you can’t see your cutting mark on the worktop use masking tape and re-mark the cutting line. When positioning the worktops on the base units you may have to chase out a bit of plaster along the wall to allow the worktop front edge to line up with the base units, ideally the worktop should extend over the base units front edge by an equal amount along its whole length.
  • Now measure the other worktop(s) again, across both the front and back edges of the base units and cut to size allowing for the joint strip. Seal the end of the worktop with either pva glue or clear sealant before fitting the joint strip to stop any future liquid spillage from damaging the worktop. When you are satisfied the worktop(s) are sitting on the base units correctly you can mark out your cuts for the sink unit and hob, once again use masking tape if you cannot see your marking out clearly. If you are fortunate the sink unit and hob will come with templates to mark the worktop for cutting out. Generally the hole to be cut is around 5 – 10mm less than the circumference of the sink unit or the hob. The sink unit can be placed face down on the worktop, the circumference can be marked out, then reduce this cut by the appropriate measurement all round. The hob may have no template but should have the cut out dimensions supplied with it, these dimensions need to be marked out very accurately and make sure the hob is in the position you want it . Double check your measurements before making any cuts in the worktop (I fitted a hob recently which only had a 5mm edge that rested on the worktop so I must have checked my marking out at least several times). These cuts can then be made using a jigsaw. When you have completed the cuts and the worktop(s) are back in position they can be fixed using the screws supplied with the base units. Again seal the cut-outs of the worktops with pva glue or clear sealant prior to fitting the sink unit and hob.


  • FITTING A NEW KITCHEN – 6 Finishing the project
  • Fitting the hob and sink unit is fairly straightforward, both come with clips that hold them down tightly to the worktop. Hobs usually have a thin foam or rubber seal around the edge and this is sufficient to keep any liquids out. Only you know whether you are competent enough to reconnect the hob to the electrical supply. I would recommend you use a qualified electrician who will use the correct size / type of cable and connect the hob correctly for safe use. With gas hobs you should use a Gas safe registered  plumber / engineer to connect the hob to the gas supply.
  • Before fitting the sink unit, if possible fit the tap(s) with two flexible water pipes to it, each around 30cm long (which will save a lot of time when reconnecting the pipework) and also run a bead of clear sealant approximately 6 – 8mm thick under the edge of the sink unit which should be more than adequate to keep out any liquid, then position the sink unit in place and tighten the clips until it is secure. Be careful not to over-tighten the clips as they tend to ping off and are difficult to refit. Remove any excess sealant from the outer edge of the sink unit. Now you can fit the waste pipework and finish plumbing in the water pipes to the tap. Now the plinths can be cut to length and fitted, they usually attach to the base unit legs via plastic clips that are fixed to the reverse side of the plinth. The cornice and pelmet can also be cut to length. Using a mitre saw power tool can give a very
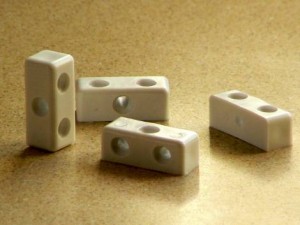
  • Fixing blocks
  • Fixing blocks
  • good quality, clean cut and therefore a better finish, especially if any angled cuts are required. Don’t forget the goggles and face mask. You may want to wait before cutting the pelmet to length as any tiled walls could alter its required length. Both the cornice and pelmet can be fitted to the wall units using fixing blocks with of course the correct size screws. Wall unit lights can be fitted, but again you may wish to wait until any tiling has been completed.
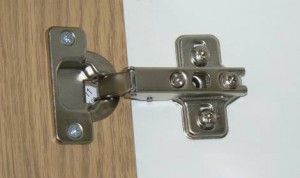
  • So finally the drawers and doors can be fitted, drawers are relatively easy to assemble following the instructions. Attach one door at a time to the units, hinges are normally in two parts, one for the unit and one for the door. Fit the unit one(s) first so they are ready to accept the door. Now fit the other parts to the door.
  • Two part hinge
  • Two part hinge
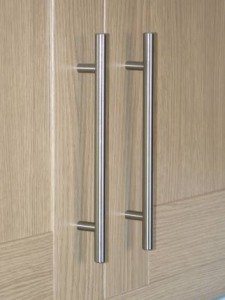
  • Handles both for the doors and drawers may require two fixing holes being drilled, there are dimple marks on the reverse of the doors to indicate where to drill the holes, these holes should be drilled as straight as possible and with the correct size drillbit to suit the fixing screws for the handles. When fitting the doors make sure the two parts of hinge mate together correctly otherwise it will be difficult to adjust the door. As you look at the hinge, the screw at the back holds the door in place, the other one enables you to adjust the door later for alignment. When all the doors are fitted they can be adjusted so gaps between them are even and all doors are level.
  • Chrome door handles
  • Chrome door handles
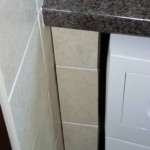
  • When finishing off the new kitchen its worth sealing any gaps at the back of the worktops with clear sealant so there is less risk of water damage before the wall(s) are tiled. Any small gaps between the kitchen units and the wall(s) can be filled using cuts of decorative clad end panel, doing this gives the kitchen a more professional finish. As shown in one of the images below I partly filled a gap between a washing machine and a wall using a piece of 75 x 15mm timber with cabinet magnets on the reverse for ease of removal, then simply tiled the timber using liquid nails as an adhesive, it was simple to do and  leaves a small gap for washing machine movement. The last job aside cleaning up and telling everyone how hard you have had to work like I do, is to blank any pre-drilled holes in the units with the plastic blanks / caps that come with the units.
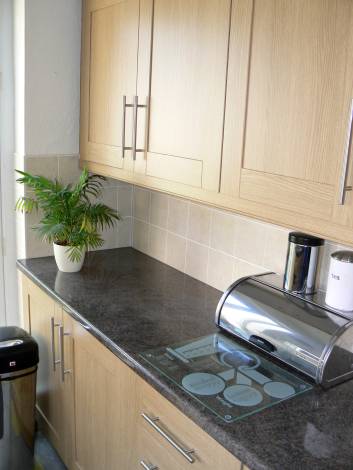
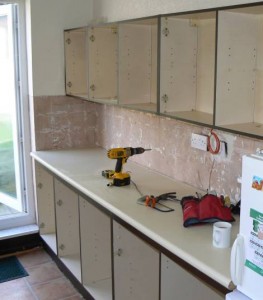
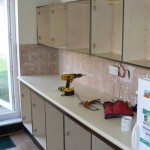
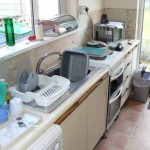
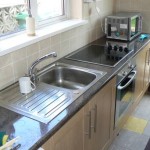
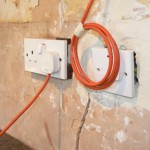
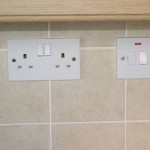
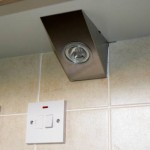
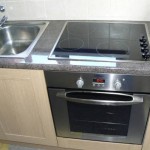
  • Below are a selection of thumbnail images from a recent new kitchen install. They show before and after, etc.
  •  
  •  
  •  
  •  
  •  


Ensuring Safe Homes: The Imperative of Electrical Testing, Qualified Electricians, and EICRs for Landlords in Glasgow

https://g.co/kgs/Fsif6i Introduction Renting out a property comes with significant responsibilities, particularly when it comes to the safet...